In La Jolla, the right staging can turn a good condo into a showstopper that sells the lifestyle buyers are seeking. If you are preparing to list, you want every photo and showing to highlight ocean views, indoor–outdoor flow, and usable space. In this guide, you will learn the high-impact moves that work in La Jolla’s luxury condo market, what they cost, and how to time them for launch. Let’s dive in.
Why staging pays off in La Jolla
La Jolla sits at the high end of San Diego’s market, with recent snapshots placing median sale prices in the multi‑million range, including examples around $2.4 million in Q3 2025. That price tier rewards listings that make the view and lifestyle unmistakable in photos and in person. Local market snapshots support the premium positioning.
National data backs the investment. In the National Association of Realtors’ 2025 staging profile, agents reported staged homes often earned a 1 to 10 percent increase in offered price, and rooms like the living room, primary bedroom, and kitchen ranked highest for impact. You can review the NAR staging highlights for the full picture.
Industry results show similar benefits. RESA snapshots report staged properties in their samples achieved strong sale‑to‑list ratios near 109 percent and that average staging investments around $3,800 produced high ROI in many cases. See the RESA statistics for benchmarks you can use when planning a budget.
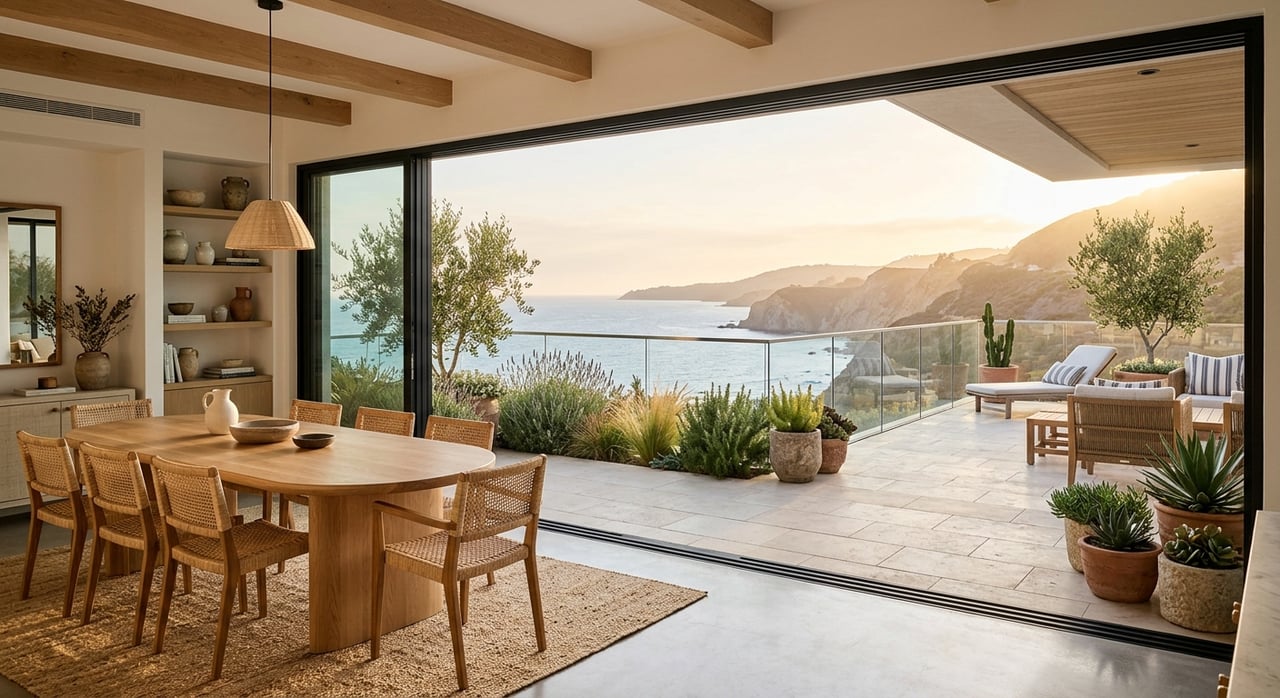
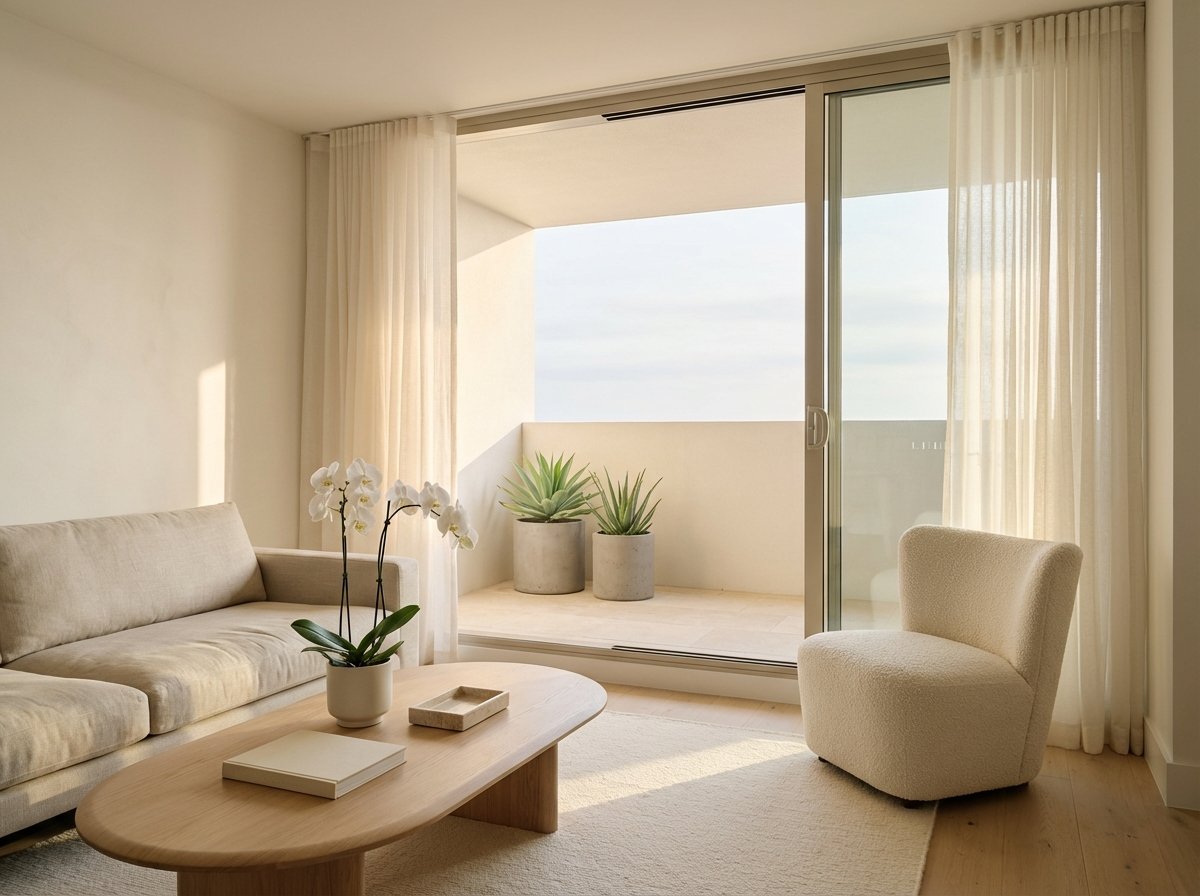
Make the view the hero
Clear sightlines to the ocean
Your view is a major value driver. Remove or reposition anything that blocks the line of sight to windows and sliders. Keep glass spotless, tracks clean, and draperies minimal so the eye travels outside immediately when buyers enter.
Stage the balcony as a room
In La Jolla condos, the balcony is an extension of the living area. Add a compact bistro set or low-profile lounge chairs, a right-sized outdoor rug, and a few planters to frame the view. Local stagers emphasize this indoor–outdoor moment because it photographs beautifully and anchors the lifestyle story. See how regional pros highlight balconies in their project portfolios.
Right-size living and primary layouts
Use low-profile furniture and predictable traffic paths so the space feels open. Avoid oversized sectionals or tall pieces that interrupt window views. Start with the living room and primary bedroom, since buyers judge these rooms first according to the NAR study noted above.
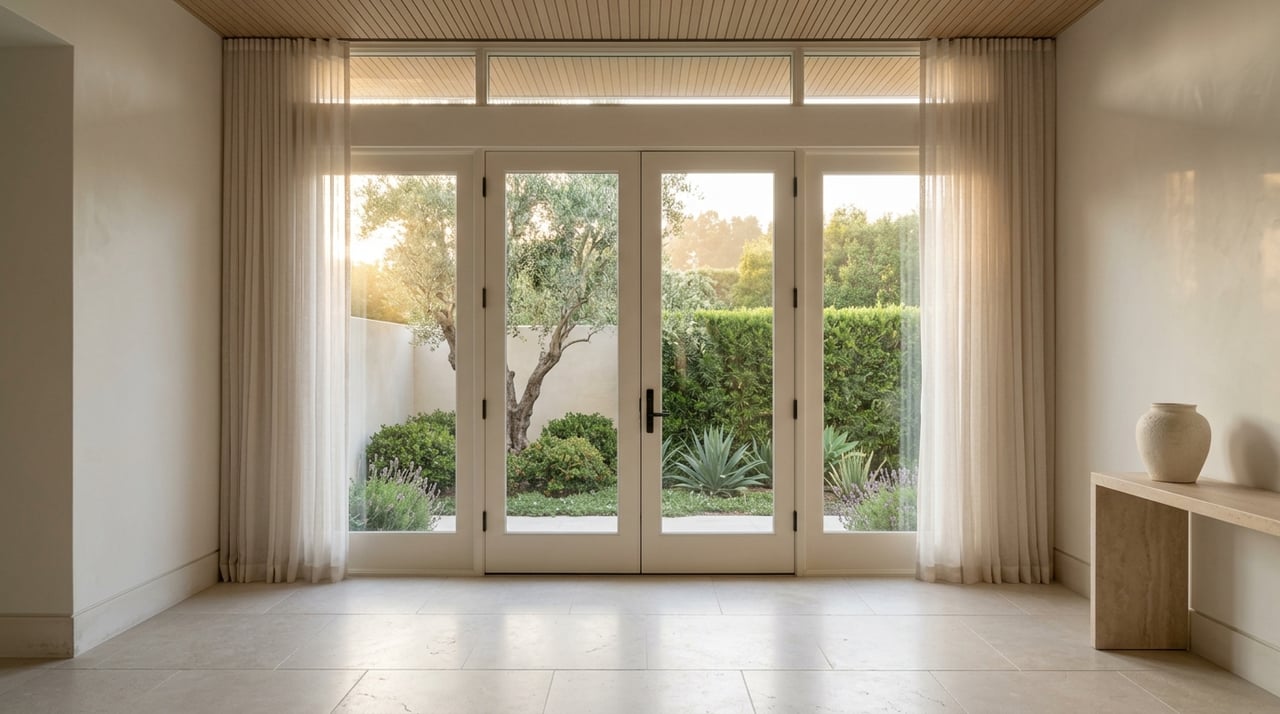
Light that flatters, photos that convert
Match color temperature and boost CRI
Mismatched bulbs make finishes look off in photos. For rooms you will photograph, use daylight-balanced, high-CRI LEDs around 5,000 to 5,600 K to keep color consistent and true. For a primer on daylight balance and results, reference this guide to natural light.
Plan for hero shots, twilight, and aerials
Ask your photographer to bracket exposures so interiors and views are both properly exposed. A single, well-executed twilight exterior can add emotional appeal to oceanfront or bluff locations, often lifting click-through. Learn why one great dusk image works in this twilight overview. If you consider drone context to show proximity to the shore, confirm compliance with FAA Part 107 and Remote ID rules as outlined by the FAA.
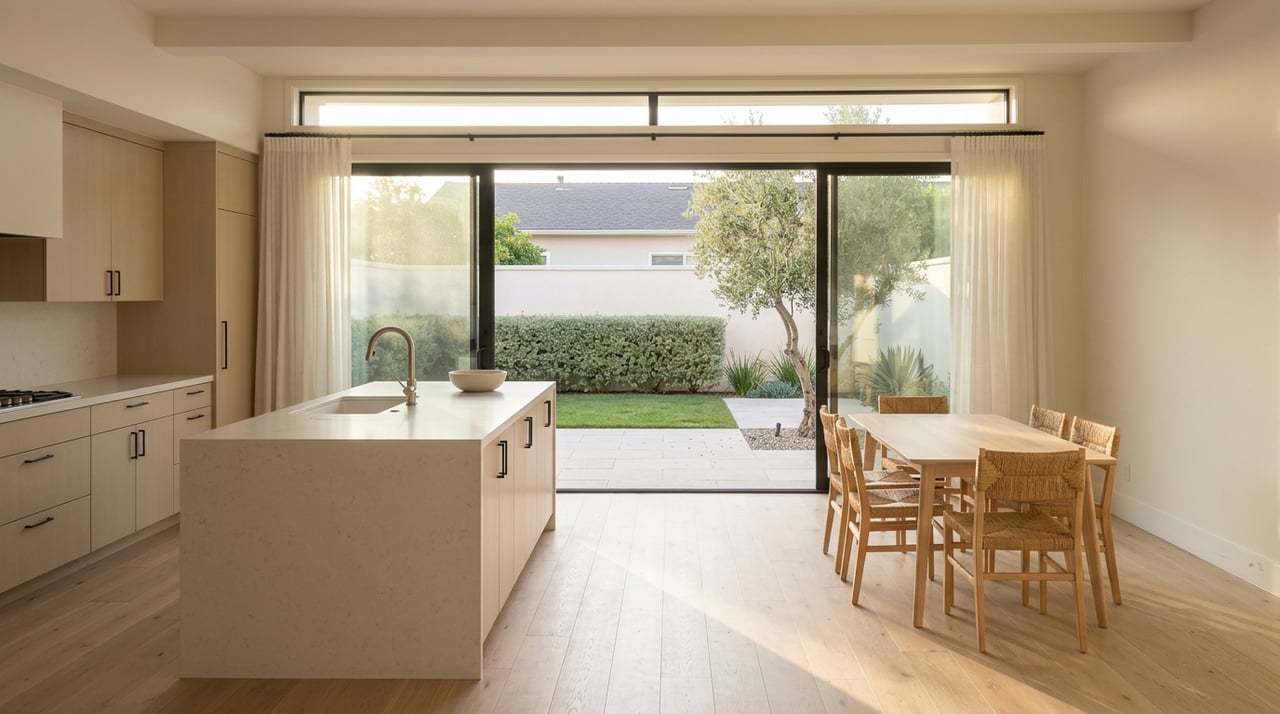
Kitchen, bath, and entry details that matter
Small upgrades send strong quality signals. In the kitchen, clear counters, use one or two styled items, and add under-cabinet lighting if needed. In baths, recaulk where discolored, polish shower glass, and use hotel-clean towels. At the entry, remove excess furniture and add a simple mirror or art to create breathing room.
Coastal materials that last and look good
Salt air is beautiful, but it is hard on metal. When you replace visible balcony or rail hardware, choose marine-grade options like stainless 316 or similar to reduce pitting and staining. For durability basics, see this materials note on marine-grade metals. Select outdoor fabrics rated for UV and salt, and opt for powder‑coated or stainless frames over faster‑corroding finishes.
A simple staging timeline for La Jolla condos
- Pre‑listing consult, day 0: Walk the condo with your agent and stager to confirm target buyer, highlight features, and set a budget. Local teams often begin here, aligning on the lifestyle story and scope.
- Immediate fixes, days 1–7: Deep clean windows and sliders, touch up paint in a neutral palette, address grout and minor repairs, and refresh lighting for consistency. Cost-effective items like paint, bulbs, and hardware deliver high impact. For typical cost ranges, see this consumer cost breakdown.
- Staging plan and procurement, days 3–14: Rent furniture and accessories if vacant, and source coastal-rated outdoor pieces. Expect lead times of several days to two weeks depending on inventory.
- Install and style, 1–3 days: The staging team installs, styles, and performs quality checks so the space feels complete.
- Photography, day after staging: Shoot interiors, the indoor–outdoor flow, and a twilight exterior where it adds value. Schedule your go-live to follow quickly.
Budgeting for impact
You can tailor staging to fit your property and goals.
- Consultation only: Often a few hundred dollars.
- Partial staging or agent-led styling: Typically in the low thousands.
- Full-service or vacant luxury staging: Often several thousand and can exceed $15,000 depending on scope and rental period.
Consumer sources place typical costs in those ranges, which you can compare against the RESA average staging investment around $3,800 and the strong sale‑to‑list ratios in their reports. Review the RESA data and the BHG cost guide to calibrate expectations for La Jolla’s luxury tier.
Building and HOA logistics checklist
Luxury buildings in La Jolla often have detailed rules for deliveries and vendor access. Confirm these pieces early to avoid delays:
- Reserve elevators and loading docks for staging days and photography.
- Request certificates of insurance from stagers and movers, naming the HOA if required.
- Align install, photography, and open-house timing to minimize repeated elevator fees.
- Confirm any signage or parking restrictions with building management.
Virtual staging, done right
Virtual staging is useful for vacant condos and can help you hit the market quickly. Keep it honest and clear. Do not add or remove permanent features, disclose where images are virtually staged, and retain originals on file. These transparency principles line up with best practices discussed in this virtual staging overview.
Quick prep checklist
- Deep clean glass, tracks, and grout, and declutter all surfaces.
- Paint in neutral, light-warm tones to maximize brightness.
- Replace dated hardware and lighting, and match bulb color temperature in photographed rooms.
- Organize closets to show usable storage.
- Stage the balcony with compact, durable outdoor pieces.
Ready to elevate your condo’s presentation?
You do not need a total redesign to make a premium impression. With a clear plan, a few targeted updates, and expert staging, your photos and showings can spotlight the La Jolla lifestyle buyers will pay for. If you are considering a sale, reach out to Kris Gelbart to discuss a tailored staging and marketing plan for your condo.
FAQs
Which rooms should I stage first in a La Jolla condo?
- Prioritize the living room and primary bedroom, followed by the kitchen, since these rooms most influence buyer perception according to NAR’s staging research.
How much does professional staging usually cost for luxury condos?
- Expect anywhere from a few hundred dollars for a consult to several thousand or more for full-service staging, with industry reports showing an average investment around $3,800.
Does virtual staging replace physical staging for showings?
- Virtual staging helps online, but physical staging still matters for in-person showings, so use virtual as a bridge or for vacant spaces and disclose edits clearly.
Do I need HOA approval for staging deliveries and photography?
- Most luxury buildings require elevator reservations and certificates of insurance for vendors, so coordinate with the HOA and your agent well in advance.
What is the best time to photograph an ocean-view condo?
- Schedule daytime interiors for bright, even light and add a single twilight exterior if the setting supports it, capturing both indoor–outdoor flow and the view.